
 Bluetooth is cool but unfortunatley I don’t have it build into my laptop. There is an empty mini-pci slot available but after trying to find a good Bluetooth card to put in there without spending a fortune I simply dropped that solution. And using one of these dirt cheap USB Bluetooth dongles is a hazzle as I don’t like having that sticking out of my laptop the whole time. Well, why not build it in as Tom did! I’ve seen this kind of projects before – but this one really only uses a Bluetooth dongle plus some cables. No hub or any other electronics so it’s actually a no-brainer to get this one working. That is as long as you have the space within the laptop to hide the dongle away… Read about how he did it in Adding internal Bluetooth to a Dell Latitude |
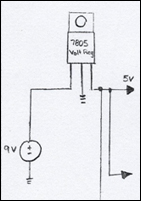 While designing all kinds of different curcuits I usually pick the designs from my head, or I go seaching on the net to find what I need. Over at DIY Live they put together a good top 10 list of curcuits that often come in handy. Like a 5v regulator, how to drive a transistor as a switch, USB pinout, a simple amplifier and lots more. They write: I have decided to compile a list of the top ten most needed circuits that are a must know for anyone interested in DIY projects. These are the basics that can all be interchanged and used in conjunction with each other to make many of the projects that we all love so much. |
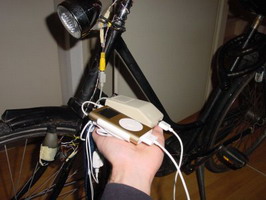 When I leave my house I always make sure that my iPAQ (don’t have an iPOD) is fully charged and ready for a full days work. I also have a charger in my car and in my office so even though I might forget to charge it during night this is not really a problem. Mark though, he realized that these options not really are sufficient while riding his bike or while out camping and therefore he developed the ‘Hand crank charger’ and the ‘bicycle charger’ for his iPOD. Both are based on a hand crank flashlite. Link: Hand crank your iPOD |
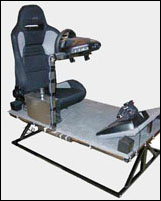 Do you want to build something that scores 9.5 on the geek scale? Wanna have a ‘real’ force feedback simulator that is as close to the real simulators as possible? Then have a look at Jared’s little project where he uses the classical ingredients as a stearing wheel and the standard pedals, but also a electrical winch for a car… He writes:
Link: The force feedback racing simulator |
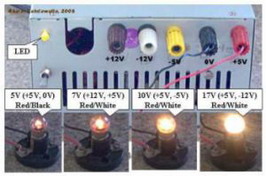 I find myself in my garage way to many times in the small hours of the day trying to find a suitable power supply to power what-ever-I’m-doing at the moment. And everytime I do this I look at an old atx power supply and thing – Hmm, I’ve got that 12v there… but… But of course someone has done this for you already and have a look at this if you need a small project to hide yourself away with during the long christmas dinners coming up. It should take about an hour or two to complete and you get a ps that can give you +5,+12,-5 and -12. Connecting between +5 and -5 will give you 10v and so on, so you also get +7, +10, +17 and +24 to play with. Read about at wiki.ehow.com |
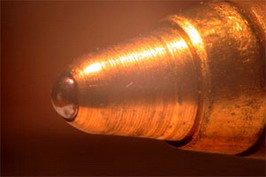 In all pictures for my projects (and other photographs also) there’s always that moment when I need to take an close-up on something exceptionally interesting, like a ball point pen… On my Canon S40 (compact 4mp but still good) I have this feature which lets me snap a picture as close as about 10cm (~4 inches) which is usually sufficient if you take the photograph in high resolution and then crop it down. But it could definitely be better, like as on this picture. Hajejan took this a step further – on a budget. He has a removable lens on his Canon EOS which is not something that I could do so maybe it’s time for me to get a new camera? To wrap it up (aka spoiler) – he mounted a Pringles can in-between the camera and the lens which allows it to get into real macro. Read about the ‘Extreme Macro Photography on a budget‘ |
 This is something I’d personally would love to have standing in the hallway during christmas to welcome all my guests. Josh writes:
He has several videos on his site where you can hear and see the hacked version in action. |
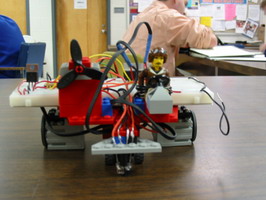 Greg starts with warning us for a long article in this DIY article. And while we’re at it have a look at this one also over at ELM, it’s really small and neat. He writes:
Link: Line following robot |
 Making snow is always something that seems complicated but after reading this article about on how you can build a snow machine yourself I must say it’s something I’m definitely will try when (if) it finally goes below zero here. The article itself is very straight forward and I myself have several question marks after reading it, but it’s a starting point. I’ll let you read it for yourself and draw your own conclusions. Link: SnowatHome.com |
|
Hard drive clocks has been around for as long as hard drives has been around. The first ones simply had a disc and the regular hands, the second generation had a whole hard drive and regular hands, and I’ve also seen a very nice one which is using light and a spinning disc to show the time. But except for the last example they still look like a clock with those plastic hands. In part 3 we take a look on how to build The real hard drive clock. Even though this clock might not fit into every home, it definitely has something about it that makes it nice to look at. Read about how it was done in The real hard drive clock |
Help us continue our work with a donation
15 queries. 0.265 seconds