
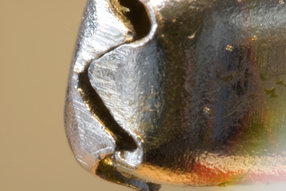
 Have you ever played around with the macro mode on a camera (you know the ‘flower’ mode)? Most people have, but it’s not that impressive. Mostly because it’s not really close up. A regular macro shot will give you something like 0.5-0.7x magnification, which is… not very impressive. So lets do something about that! In this article we’ll show you one way to convert a Canon EF-S 18-55 standard lens to a super macro lens giving you from 1 to 4.5 times magnification! Then we’re talking an object of .2 inches (5mm) wide filling the whole picture! This image on the side is a long time exposure of an alligator clip up close taken with the lens. Pages 1-5 shows you the lens works and ideas behind it. Page 6 contains some sample pictures made with the lens Page 7 shows you the difference in different focal lengths (how much magnification) Page 8 demonstrates the practical differences in aperture and what’s useful Page 9 shows you in detail the different depth of fields with different apertures Link: DIY High quality macro lens out of a Canon EF-S 18-55 |
|
How often do you think people (maybe you?) spill beverages onto their laptops? Apparently more often then you think. After the ‘liquid spill’ article last year I’ve been contacted numerous amount of times by people that spilled a bit of wine on their keyboard or that had their cute little three year old pour milk over the laptop. With this in mind and a bit of time over I decided to sacrifice a laptop with a damage screen and see if it could be recovered after having a glass of wine and one of lemonade poured over it. So, was it a sacrifice in the end? Have a look at the article which also includes a video (god, I’m a director all of a sudden) of how it was done. Link: Wine in laptop |
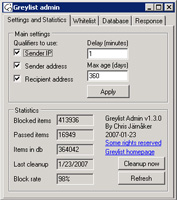
First my apologies to all people who come back here day after day and wonder why there’s no action on Grynx. Well, try working 10 hours a day, studying for your MCSE every evening and then take care of your family as well. I’m simply not allowed into my garage any more In September 2007 I published an little application of mine called Greylist. At that stage Greylist was a bit unpolished and rough but it did evolve during the next coming months whenever I could stick a bit of time into it. Today I published v1.3 which now is more of a grownup and handles both stress and problems in a more correct way.
Features of today includes selective blocking (sender ip and/or sender address and/or recipient address), stores data in a access db or in MS SQL, the database can be shared across the enterprise, automatic pruning. In the latest version I added functionality for different actions upon grey listing a recipient as well as custom server messages. If you’ve read this far and don’t have a clue about what I’m talking about then let me say this: If you’re an Exchange admin and you have problems with spam then be sure to check out my implementation Greylist – freeware Grey list for Exchange |
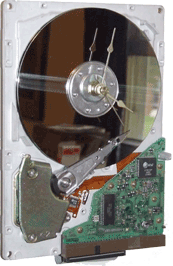 I made one of these back in December last year (link) and then I saw another interesting version from Rick.
I think this one is interesting as you can actually see that it’s a hard drive. The one I made had a different goal though – to only have hard drive parts visible. Link: Harddrive clock |
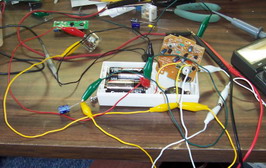 John Schuch did what I’ve been thinking about for quiet some time. To take a existing RF device and turn it into a power (AC) control.
And here’s some food for thought for you DIY’ers. How about taking one of those cute small radio controll cars and turn it into a dimmer control? The benefit of using these small cars as a build base would be that the rf reciever cards are very very small. Link: Turning a wireless doorbell into a remote control relay |
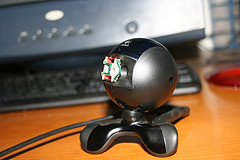 Jose Luis Garrido slaughtered an old cdrom reader… and put the lens for the laser in front of his webcam. What did he get? A DIY microscope webcam – kind of cool actually! The page is in Spanish so I also give you the option to read it through Google’s translation engine. Link: DIY Microscope webcam (Spanish) |
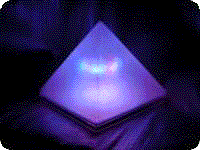 Toon Beerten sent us this wonderful DIY mood lamp.
Link: RGB Mood Lamp |
|
This is such a thing which actually isn’t a project in itself – but if it will give you a tenth as much help as its given me in the past years then it’s something I just have to share with you. In short – attach your cables in a smart way with an ordinary office supply and keep them movable/slidable. Link: Binder clips and cables |
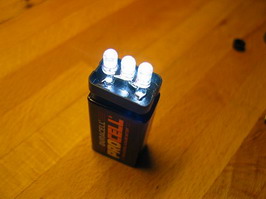 P.O. got so excited by all the responses from the TicTac flashlight project that he sent us another of his creations. This time it’s a LED lamp created from the scraps of an old 9v battery and three LED’s. No need to use a resistor here as he’s used three 3.5v LED’s which adds up to a required voltage of 10.5v… which the battery can’t supply. The benefit of this is that you don’t have any losses in a resistor and the battery will end up lasting longer – but the LED’s will not operate on 100%. Take it or leave it, this is a great project that involves few components and has a compact and robust design. |
Help us continue our work with a donation
15 queries. 0.227 seconds