
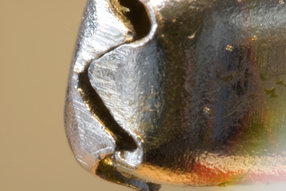
 Have you ever played around with the macro mode on a camera (you know the ‘flower’ mode)? Most people have, but it’s not that impressive. Mostly because it’s not really close up. A regular macro shot will give you something like 0.5-0.7x magnification, which is… not very impressive. So lets do something about that! In this article we’ll show you one way to convert a Canon EF-S 18-55 standard lens to a super macro lens giving you from 1 to 4.5 times magnification! Then we’re talking an object of .2 inches (5mm) wide filling the whole picture! This image on the side is a long time exposure of an alligator clip up close taken with the lens. Pages 1-5 shows you the lens works and ideas behind it. Page 6 contains some sample pictures made with the lens Page 7 shows you the difference in different focal lengths (how much magnification) Page 8 demonstrates the practical differences in aperture and what’s useful Page 9 shows you in detail the different depth of fields with different apertures Link: DIY High quality macro lens out of a Canon EF-S 18-55 |
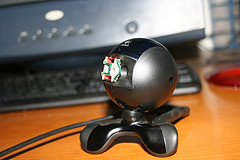 Jose Luis Garrido slaughtered an old cdrom reader… and put the lens for the laser in front of his webcam. What did he get? A DIY microscope webcam – kind of cool actually! The page is in Spanish so I also give you the option to read it through Google’s translation engine. Link: DIY Microscope webcam (Spanish) |
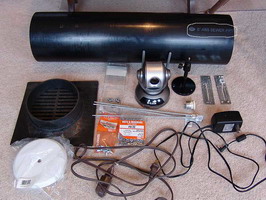 I’ve had my own webcam standing in the window of my office for the last two years. It’s standing there because it’s nice, warm and dry. I’ve been thinking of taking the webcam and putting it somewhere outside but…. then I’ll need to buy an enclosure or an outdoor webcam and both of these solutions will cost you more then a bit of money. Or build your own enclosure like Alek did. Actually he needed it outside at the neighbours house to view his own halloween and christmas decorations! |
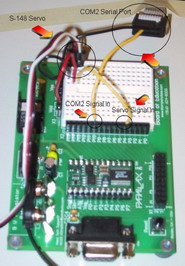 Ever thought about building a web controlled webcam? I sure have! Even though you can buy one today for not too much money, the challange is still interesting. Based on the parralax basic stamp starter kit 2, Jawed did just this. The project is mostly focused on the ‘difficult’ part (the programming) and you will have to use your own imagination for the attachment of the servo to the webcam. You’ll need the starter kit, a servo from an R/C car and a couple of cables to get started. And oh, yes – a webcam can come in handy! Read in full in the Robotic Webcam project |
 In our previous night webcam project we got it running – now it’s time to make it work at lot better. We have a look at different IR LED’s and angles and see what works best. Link: Webcam in the dark – part 2 |
 Have you ever been using a webcam in a room with low light? Or have you ever wanted to have a webcam monitoring your dog, driveway or baby? Well, I have – both. Using a webcam in a room with low light usually works bad, and in most cases it doesn’t work at all. You can get around the problem in low light by using a webcam with high sensitivity, like the Philips PCVC740k or PCVC840k (they’re actually the same inside!). It has a sensitivity of 1 lux which is very little light, and it can be compared to the light from one candle. Link: Webcam in the dark |
Help us continue our work with a donation
19 queries. 0.205 seconds